Manual curation tutorial
This tutorial will guide you through the manual cell-type curation process in CellExplorer.
- Launch CellExplorer
cell_metrics = CellExplorer('metrics',cell_metrics); Navigate the cells using the keyboard, the graphical buttons (shown below), or by middle-clicking any cell from the plots.
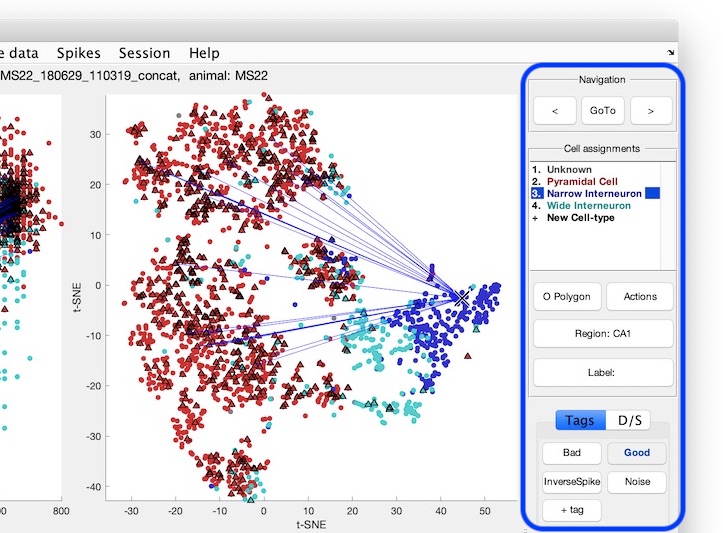
- Assign cell types from the
Cell Assignmentside menu using your mouse (see above screenshot), or the numeric keys (not the keypad). You can add more cell types by clicking+ Cell-typein the list of cell-types. You can also do group assignment via the group action menu:- Select cell(s) and press
spaceto open the group actions menu. - Press cmd/ctrl+P to start drawing a polygon, using left mouse button, circling the cells you want to select (a middle mouse click deletes latest polygon dot). This can be done from any of the plots. Finish the polygon by clicking the right mouse button. This will show the group action menu.
- Pressing
spacewithout any cells selected will show a cell selection filter dialog. Select a filter and press OK to open the group actions menu.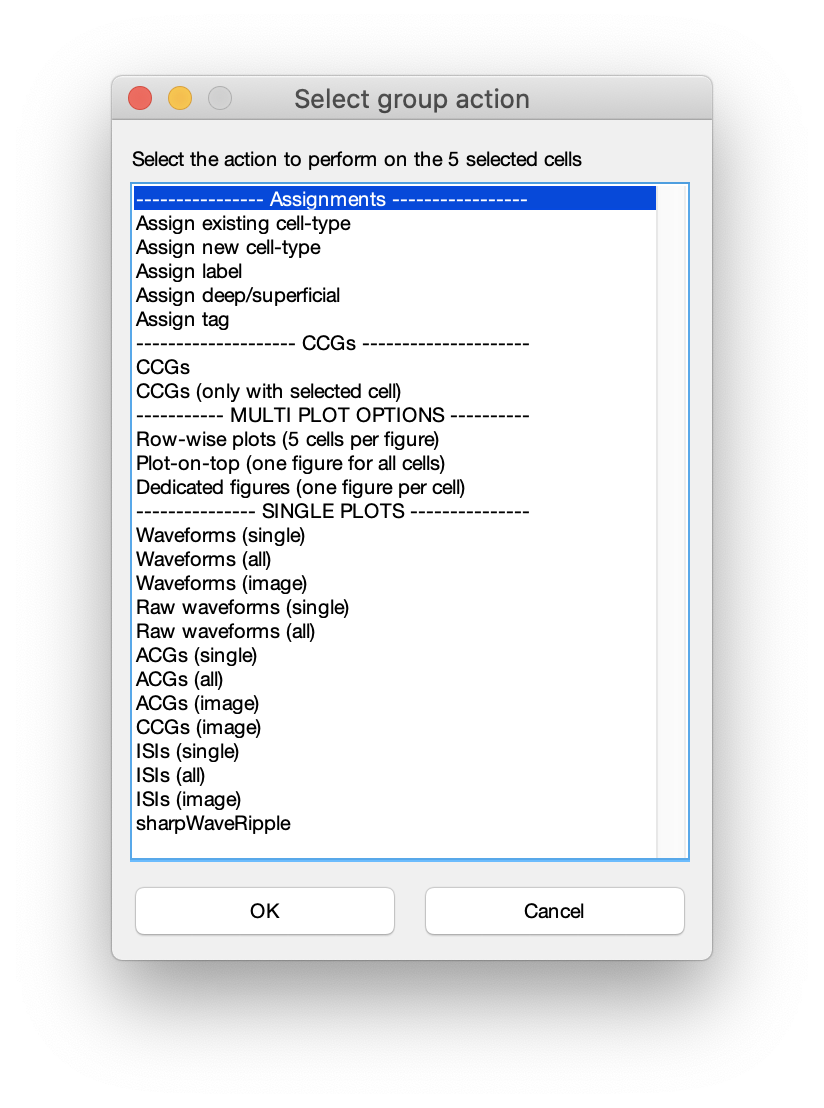
- Select cell(s) and press
- When finished you can save your progress from the top menu
File->Save. This will save your metrics to the original single-session cell_metrics files, even when working in batch mode. - A dialog will be shown and you can select to update sessions with tracked changes or all of them.
All your classification actions are tracked, shown in the message log, and can be reversed step-wise by pressing ctrl+z. The pre-defined list of cell-types shown in CellExplorer is defined in preferences_CellExplorer.m. Putative cell-types are stored in cell_metrics.putativeCellType. Cell types present in cell_metrics.putativeCellType will be added to the selection-list in CellExplorer. Default cell-type colors are defined in preferences_CellExplorer.m. Learn more about preferences and the interface below.
Preferences Graphical interface