Tutorial on exporting CellExplorer figures
Exporting figures in Matlab can be a headache, so CellExplorer have two built-in figure exporting options: exporting the main interface and individual actions plots.
Table of contents
- Exporting the CellExplorer interface
- Exporting figures using the action dialog
- Exporting other figures
Exporting the CellExplorer interface
The steps below shows how to save a PDF file of the main interface of CellExplorer. Saving a PNG (image file) is more straight forward, but the same steps can be applied.
- Launch CellExplorer
- Select
File->Export figurefrom the top menu. This will open a Export Setup dialog. Before the dialog is shown the paper size is set to the current figure size and the renderer is set to painter. - Use the left side Properties menu to navigate the exporting dialog to apply further optional settings:
- Fonts: We recommend a minimum font size of 14 to minimize further editing.
- Rendering: Exporting to raster or vector graphics is defined in the ab
Custom rendererand selectpainter(vector graphics) from the drop-down menu. The rendering has already been set topainterand it should not be necessary to change it.
- If you altered any settings, click the button
Apply to Figure. - Click the button
Export...to bring up the Save As dialog to specify location, file name and format
When applying settings to the figure (Apply to Figure), the figure sometimes resizes to a smaller size. To fix this, just resize the figure back to the full size before clicking Export.
If the export figure dialog is not sufficient for your need, you can bring up the main figure menu by pressing m.
By following above tutorial you should end up with an exported figure like shown in below image: 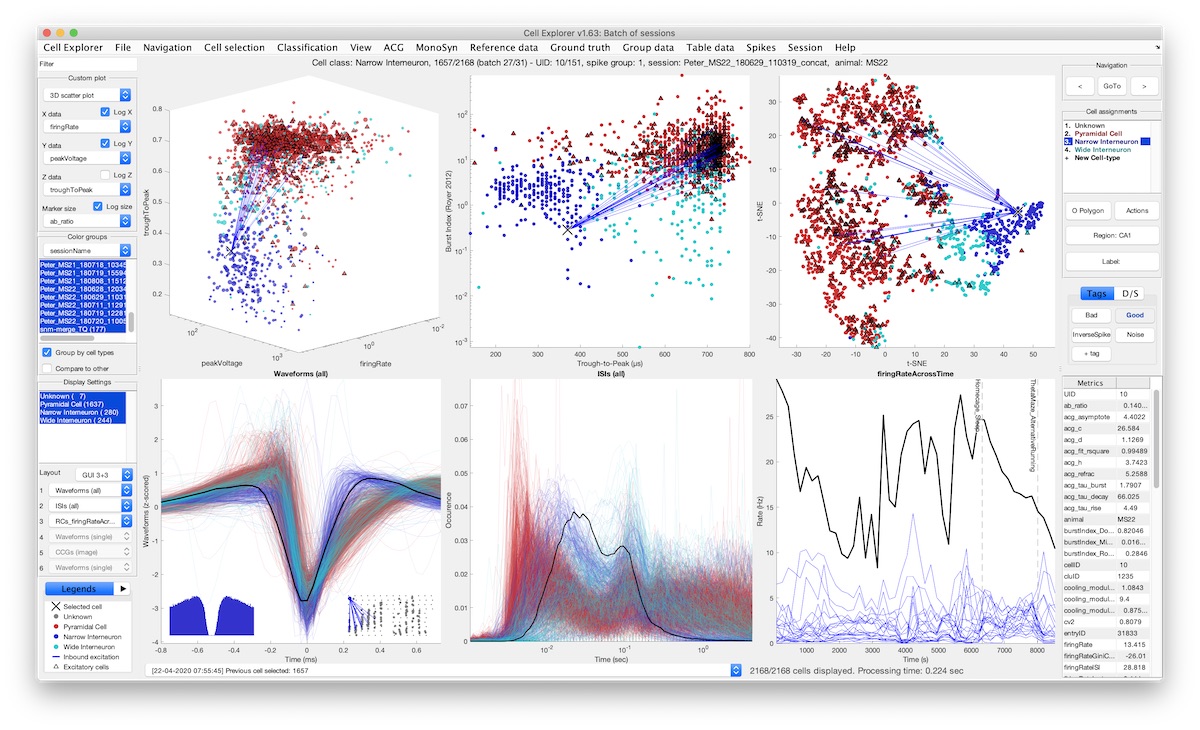
Exporting figures using the action dialog
- Select a set of cells, using the mouse and open the actions dialog (press
spaceor theActionsbutton in the right panel). If no cell selection is done before opening the action dialog, a cell selection dialog will be shown first: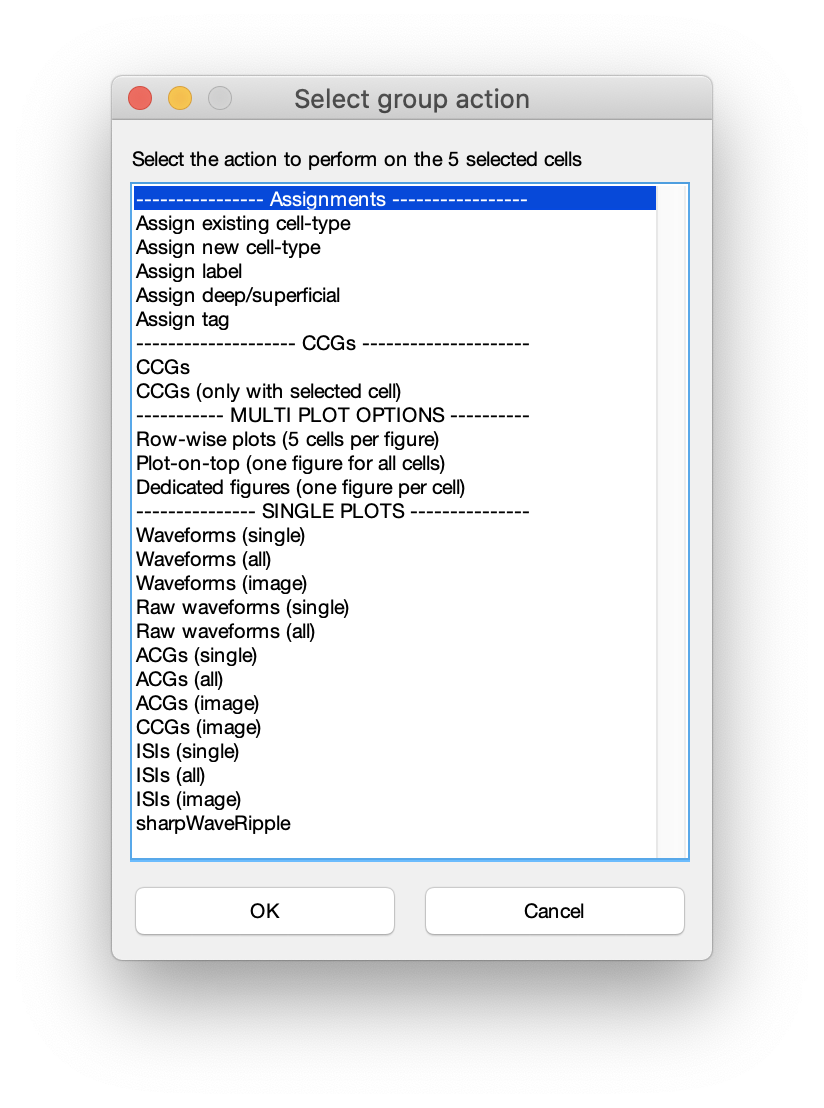
- Select one of the three
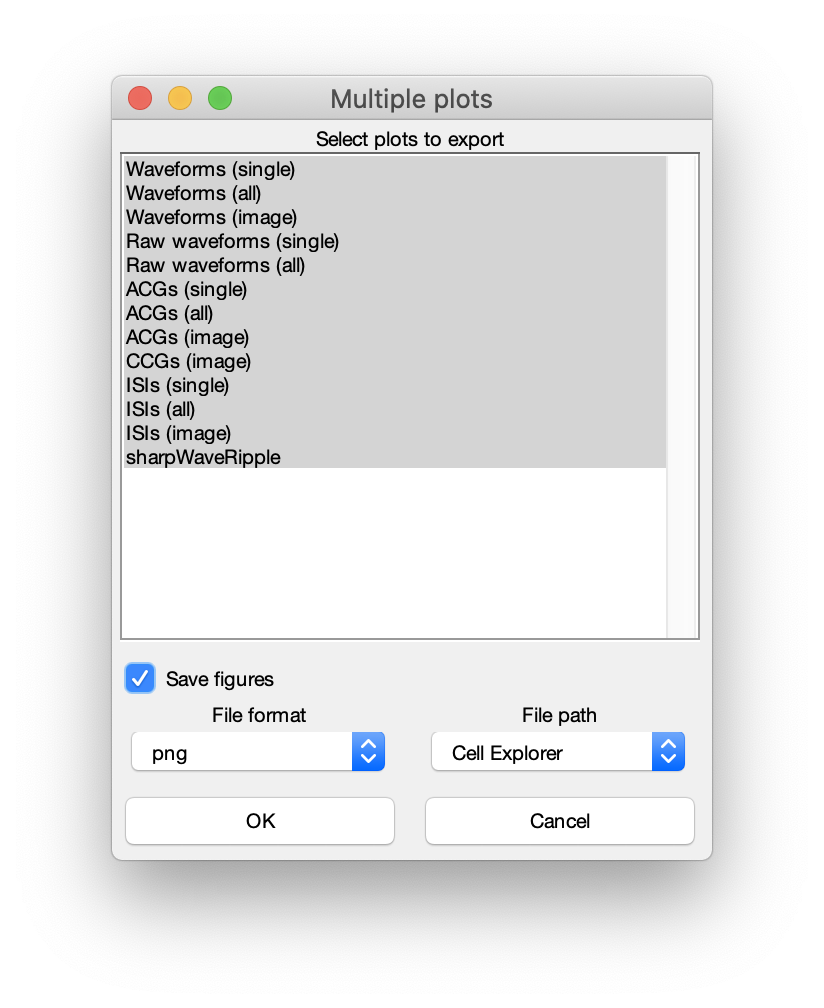
MULTI PLOT OPTIONSin the actions dialog and press OK. - In the multi plot dialog shown below, select the plots to generate, check the
Save figurestoggle, and define file format (.png or .pdf) and file path (Save to the basepaths, to the CellExplorer path or a user defined path):
When you select to save your figures to the CellExplorer path or basepath, they will be saved to a subfolder named summaryFigures.
Be aware that saving to a pdf file, is substantial slower than saving a .png file, but the figure will be saved with vector graphics.
Exporting other figures
Any other figures produced by CellExplorer can be saved using the File menu options Save As or Export Setup....